
In the last month and a half of nursing Cyprian, I've gone through 20 or more magazines, effectively clearing out my backlog. I've enjoyed reading about children, parenting, money, faith, and food (I receive quite an assortment of periodicals, including Cooking Light thanks to David's sister Jenny). The July Cooking Light contained an appealing recipe for which I already had most of the ingredients, so I tore it out to try.
Baked Ziti and Summer Veggies calls for fresh yellow squash, zucchini, tomatoes, basil, and oregano, all of which I had ready from my very own garden!
Someday I might also grow the onion and garlic the recipe calls for (this lovely head of garlic came from my friend Hunter's garden). And years from now I hope to get eggs from our very own backyard chickens (I will wait to pursue this when I have a child old enough and interested in tending them herself).
I followed the recipe except for two alterations: I used fun, colorful Wacky Mac pasta and omitted the ricotta (just subbed in a bit more mozzarella). The resulting casserole was delicious!
The real test was whether Teresa and David would eat it, too. I served Teresa a small portion. At first she pushed it around with her spoon and declared, "This yucky. No can try it." But she did try it and ate a few bites herself. When I helped her eat some more, she received it gladly and even said, "This very good!" She finished her portion!
David ate all of his serving, too, although he did feel it had too many veggies and not enough seasoning. I think I'll be making this again!
Wednesday, June 29, 2011
Garden to table

Saturday, June 11, 2011
Putting up my green beans

I wanted to make a record of how I prepare my green beans for freezing so that I can easily reference it when this time comes around again next year. Perhaps it might also help someone else, so here goes:
This is my second harvest of green beans (and a few wax beans to add a fun color variation, although I do not like their taste as much). The first harvest (from 3 days prior) waited in my refrigerator, unwashed in a plastic grocery bag loosely tied.
First I wash the beans and snap off their pointy ends (and any stem ends that make it into my basket - I usually snap the bean right off its stem end when I pick it) and put those in the compost container. Then I cut the beans into bite-sized pieces, usually 3 or 4 segments per bean.
Next I put the cut beans in a steamer basket (enough to cover the basket but not too thick - I did three rounds this time) and steam them, covered, for about 3 minutes.
Then I use a hot pad to dump the blanched beans from the steamer basket into a bowl of ice water. I leave them in for a couple minutes and swish them around with my hand until they are tepid. Then I use my hand to pick up the beans and lay them out on a clean dishtowel to dry a bit.
Next I shake the beans in the dishtowel and dump them onto a cookie sheet. I spread them out and put the tray in the freezer for a couple hours. This allows the beans to freeze separately so they'll come out of the bag nicely later (rather than clumping together, which they might do if frozen directly in a bag).
Here they are in a zip-top bag, ready to go back in the freezer. I dole out beans for recipes as needed (they're great in soups, stir fries, casseroles, and as side dishes).
I'll repeat this process another time or two before my beans are done for this season. I prefer to plant all my bean seeds at once so I have big harvests to put up in the freezer for future use (rather than planting a few seeds every few weeks for a more continuous harvest for fresh use).
This year I have one row of green bean plants (bush variety), so about 12 ft by 1 ft of space. Next year I might devote more space to the beans because we enjoy them so much (and I go through my frozen beans within a couple of months).
One thing I learned this year: Teresa loves green beans cooked, raw, or blanched. She'll eat them right out of my basket, off the towel as the blanched beans are drying, or as a plain side dish served at meals. Hooray!
A big thank you to baby Cyprian for sleeping for hours midday so I could put up the beans! :)
Thursday, April 7, 2011
Rain barrel and flower bed dilemma
Here's my new rain barrel. The day after David installed it we had a downpour and the barrel was completely filled (all 80 gallons!). The spigot handle is a bit tough to turn, so I need to devise some way to make it easier on my hands. And the water comes out slowly, so I either need to be patient for my watering can to fill or, as David prefers, open the barrel lid and plunge in the can. I'd also like to put something under the spigot to set the can on...maybe gravel?
Here is the backyard flower bed David dug the Bermuda grass out of. We were deliberating how to fill it for planting (landscaping cloth or plastic and then soil, or soil amendments mixed with the existing clay?). Then it rained and we discovered that it floods. Will plant roots soak up that much water? Or will it make them all rot? Should we put down rocks?
Tuesday, March 22, 2011
March garden update
First, an admission of failure: the tomato seeds did not grow. Maybe 4 or so sprouted in each of my egg carton greenhouses...and then molded. They were fuzzy. It was just too wet. Maybe straight peat moss is a terrible medium for seed starting, or (probably) I just put too much water in it. Anyway, I tossed everything in the compost.
The new batch of compost, that is. First I moved my old batch to the garden! This picture shows what it looked like when I lifted the bottomless barrel off the pile in order to shovel it into the cart I borrowed from our neighbors. The compost could have used a few more weeks/months of "cooking" but I wanted to put it in the garden beds now, before my first planting.
I spread my compost (along with 3 additional bags of cow manure compost) over the two beds. The soil is delightfully rich and loose, and I have great hope that it will produce another bountiful harvest for us!
I decided to try semi-square-foot gardening for my first planting (carrots, lettuce, spinach, green onions, and turnips - which I bought solely out of curiosity...I don't even know if I like turnips!). I'm hoping the square plantings will yield more than rows did last year - we'll see! The lettuce in the right middle square came up on their own (from the seeds I planted there last fall). Nice!
I also planted some basil seeds in between the oregano and thyme in the first long planter. 4 strawberry plants survived from last summer (second long planter). Chocolate mint is sprouting up all over the large round pot, and I have one stem of green rosemary.
Friday, March 11, 2011
Egg carton greenhouses
Last year I kept some of the seeds from my two favorite heirloom tomatoes, Cherokee Purple and Amish Paste. I meant to plant them a week or two ago, but I finally got around to establishing my egg carton greenhouses this week.
These plastic cartons are from Born Free brand eggs; they have two sections with egg pockets and one cover. To make a greenhouse for seed starting, I removed one of the egg pocket sections - it will be used for watering, underneath the other egg pocket section. Then I used a nail to poke several holes in the bottom of each egg pocket in the remaining section. Then I filled the pockets with moist peat moss (which I have left over from mixing soil in my raised beds).
Finally, I placed one tomato seed on top of each spot and used a plastic spoon to gently nudge it under the surface. One carton is full of Cherokee Purple seeds and the other of Amish Paste, so I could potentially get 12 of each (though that is highly unlikely).
I don't have any grow lights or especially sunny windowsills, so I'm not sure where to put these so they'll get adequate light and heat to germinate and grow.
Wednesday, November 10, 2010
Frosted Garden
Morning frost has visited our part of the country and left its mark on the garden:
Those were my green and wax beans - about half the plants had inch-long baby beans growing on them. Oh well!
Interestingly, my spinach, lettuce, and carrots are holding out. The lettuce stems turn to ice, but the leaves are still edible. My mom told me carrots can last quite some time in the ground - she even found one that survived a whole winter (under snow and everything). I'm not sure when I should pull mine up - they're still pretty small right now.
I don't think those peas in the back are going to make it, but they haven't died yet.
In anticipation of the frost, my neighbor cut all her lovely zinnias and brought a bunch over for me. They are so cheerful in a vase on my kitchen counter! David admired them, too, saying this one reminds him of the Sacred Heart:
PS "Floating row covers" are on my wish list for frost protection next spring/fall, but I've read that I could simply use old sheets and tie them over the plants every night. I didn't try that this time because I was too lazy. :p
Monday, August 16, 2010
Rabbit Nest!
One of the books we've been "reading" (really just describing the pictures) with Teresa is a Little Golden Book called Little Cottontail. On the second page, Little Cottontail's nest is described as "soft and warm, with a bed made of grass and tufts of fur."
Today, while I was clearing the wax bean bushes out of the garden, I discovered this:
A bundle of dried grass? That didn't get there by itself. What put it there? I moved the top bundle aside and found this:
Can you see the tufts of fur beside the wood? Here's a closer look:
Thanks to Little Cottontail, I recognize this as a rabbit's nest! Right IN my garden!
I used my hand cultivator (little rake) to see how deep the nest went (not too deep) and brought up a lot more of the fluff. It looks like this made a very cozy nest under the protection of my thriving bean bushes. We had seen a rabbit in our yard regularly 2 or 3 months ago, and something was definitely chomping on my chard (but, amazingly, no other produce!). But I had no idea his residence was my garden. Gives new meaning to the term "garden bed"!
Tuesday, July 20, 2010
July Garden
The garden is producing very little this month; it was nearly decimated by the June heat wave we experienced here in Charlotte (in the 90's for several weeks). I've pulled up everything but the tomato and zucchini plants (which are still bearing here and there), the cantaloupe, and the beans (which are still in the ground only because I'm collecting seeds for next year).
1.5 hours of labor and 3 hours of simmering later, I had my very own homemade pasta sauce. I was very disappointed to see that 14 tomatoes only made half a jar of sauce. Fortunately, it tasted very good - sweet and fresh!
Harvest of carrots. Some were molding in the ground, so I had to pull them all up. They may be small and funky looking, but they taste great and are keeping in the fridge just fine.
The mystery volunteer plant (that God planted and I watered) turned out to be a cantaloupe! This one is almost ready to bring in and slice, and there's another one growing, too. :)
From garden to plate: homemade pizza with sliced tomatoes and basil; steamed zucchini and carrots.
My four little butternut squash. Two are hand-sized and two are barely bigger than small. I haven't baked them yet.
Wednesday, June 9, 2010
Recent harvests
Okay, even I'm tired of salads now. But my lettuce is still producing abundantly, so I give it away as often as I can. For a recent potluck, I picked some buttercrunch lettuce and pulled up a few carrots, too:
A few days later I picked lots of green and wax beans (and a zucchini, too). Yesterday I tried blanching the green beans for freezing. It seemed to work well, but I won't really know until I pull them out to eat in a couple months! Sliced zucchini, coated with olive oil and garlic powder and then broiled, continues to be my favorite way to eat these yummy veggies. But zucchini bread is a close second!
Sunday, May 30, 2010
End of May Garden Update
 Abundant growth!
 The tomato plants are producing, and the big sticks (along with some bamboo poles) are holding them up well so far. The hybrids have at least 6 green tomatoes per plant and the heirlooms have about 4 per plant.
 A cluster of Big Beef tomatoes.
 Swiss chard, carrots, mystery volunteer plant, curly lettuce, buttercrunch lettuce, and spinach. I've enjoyed three batches of steamed and buttered chard, several collections of spinach (for salads and soups), and SO MUCH LETTUCE that I've given away 3 full bags.
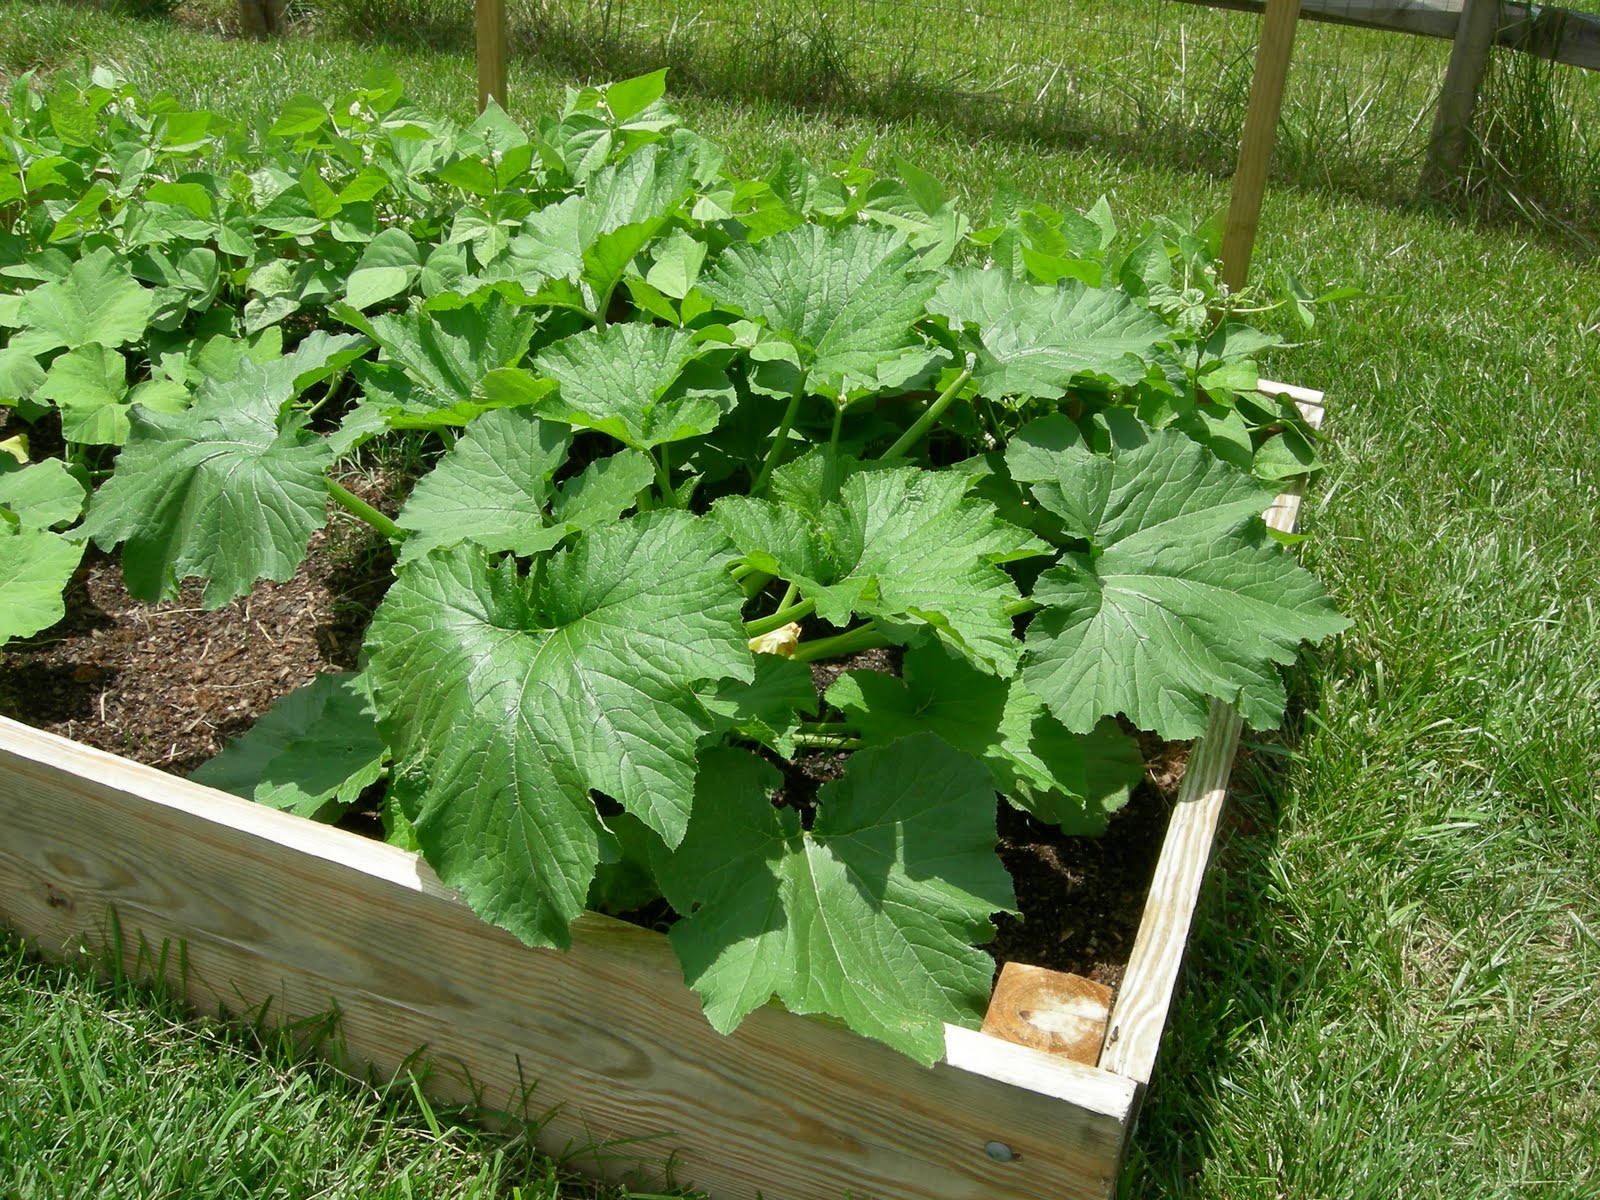 Big single zucchini. This thing's leaves are bigger than dinner plates and the leaf stalks are an inch thick. Wow!
 4 butternut squash vines (with itty bitty baby butternuts on them!) - they're creeping around the zucchini now and I'm considering putting up a trellis for them to climb.
 Cluster of 4 zucchini plants. From all of my plants combined, I collected 6 zucchini for grilling tonight - yippee!
 Yellow beans and green beans - these now have baby beans on them.
Thursday, April 22, 2010
How does your garden grow?
 With a planter of herbs (oregano, thyme, basil, and cilantro)
 A pot of rosemary (which definitely needs to be moved to a bigger pot so it can become a bush)
 Some chocolate mint
 A planter of strawberries
 Two hanging baskets of forget-me-nots
 Six tomato plants (two hybrids in the front - Burpee's Better Boy and Big Beef - and four organic heirlooms around and back: Purple Purden's, Amish Paste, Cherokee Purple, and Soldaki)
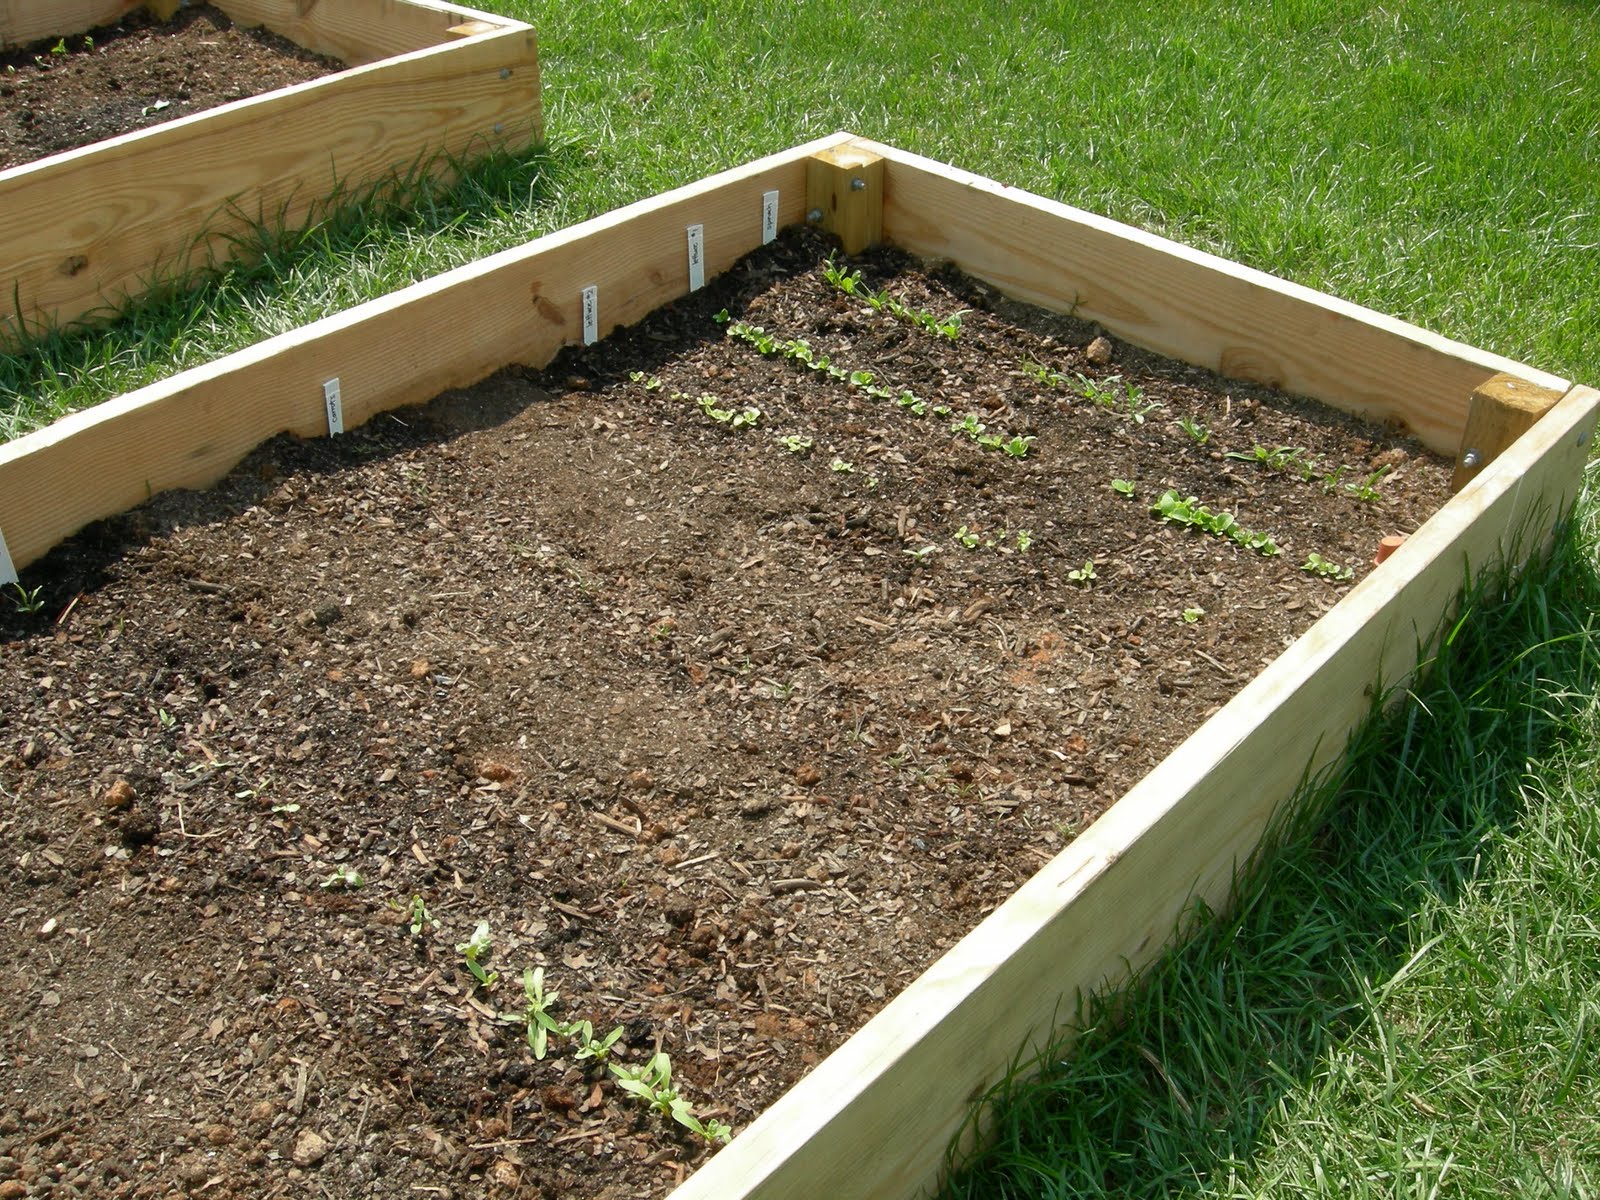 Some leafy greens and carrots (they got a late start, but we'll see what we can get out of them!)
 Some newly sprouting green beans
 A hill of butternut squash
 And a hill of zucchini.
Monday, April 12, 2010
If you know this won't work...

...just tell me now.
First I thought we might make tomato cages out of leftover metal fencing. Then I attended a gardening workshop and learned that such cages can stunt tomato production because they don't allow enough sunlight to reach the plants' leaves. The presenter recommended tall stakes. While chatting with my neighbor about her stakes, I learned that the store bought kind are not cheap. That bothered me.
When David and I were discussing the construction of our compost container (using scrap lumber and scrap chicken wire, probably), I discovered a pile of trimmed branches behind our shed. I removed all the twigs and trimmed them further. Then I artfully arranged them (ha ha) over the spots where I'll put my tomato plants. They're plunged deep into the soil - we'll see if they can bear the weight of my incredibly productive tomato plants (I hope!).
Monday, March 29, 2010
Garden progress


